Collaborative GitHub Workflow
To ensure a smooth workflow throughout all of our projects, we have a set of policies so that everyone would know how to do things the Daedelus way.
Creating Issues
- Go to the "Issues" tab in the repository.
![]()
- Click on the "New Issue" button.
![]()
- Describe the issue. Add a title and description of this issue so the people who have to work on it will know what to do.

Tip: Project maintainers can add labels, set milestones, and assign users to relevant team members.
- Create a Feature Branch by clicking the develop button on the right side of the screen.
- Use a branch name like "your_username/feature" so we'd know who did which feature. Example: oshi/revised_readme.
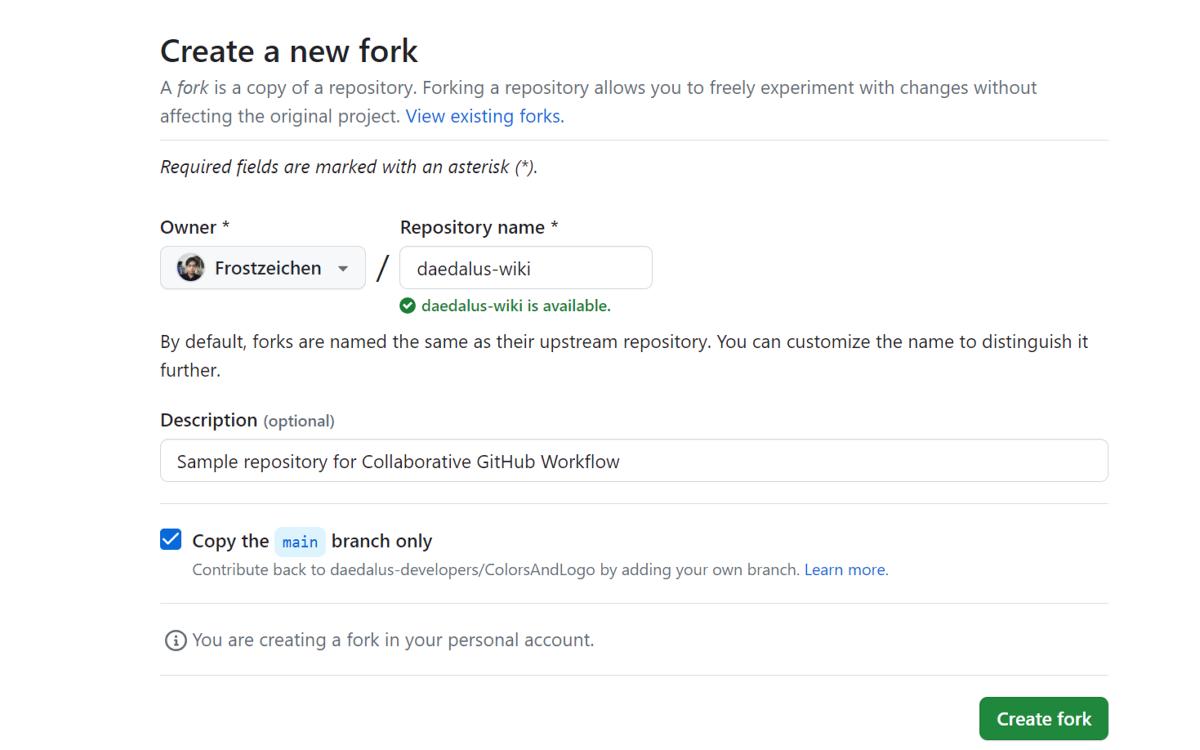
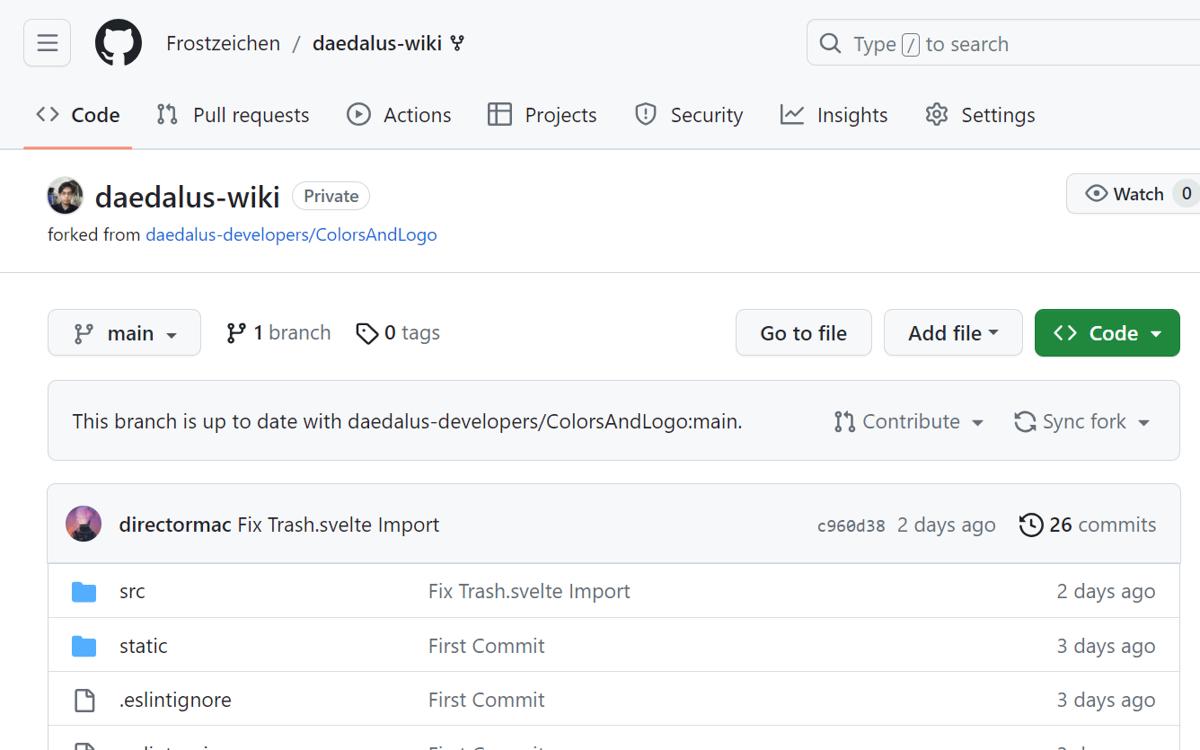
Fork the Repository
- In the "Code" tab, click on the "Fork" button at the top-right corner of the original repository's page.
![]()
- You will be moved to the "Create a new fork" page. Fill up the form and click on "Create fork" to make your own fork of the project.
- You will be redirected to your fork's page. You are now ready to work on your Feature.
Clone Your Fork
- On your fork's repository page, click on the "Code" dropdown button.
![]()
- Make sure you are on the HTTPS tab. Copy the HTTPS link to your clipboard. TIP: You can also use the other modes if you know what you're doing.
- In your local terminal (either Windows CMD, Linux Terminal, or VSCode Terminal), use the command
git cloneto clone the repository to the current folder.
Work on Your Feature
- On your own cloned copy of the codebase's fork, make changes according to the issue's requirements.
TIP: If you plan to reuse an old fork, do not forget to sync your fork and use git fetch and git pull so you would have the latest version of the original before working.
- Be sure to test your code before even attampting to commit.
- Commit your changes atomically with descriptive commit messages. On VSCode, use the Git Source Control tab (Ctrl + Shift + G) to manually add files for staging. DO NOT forget to provide appropriate commit message for EACH file changed.
NOTE: Add and Commit for EACH feature you add. DO NOT wait until you've finished all the features before committing anything.
- Push your changes to your forked repository by using the following command:
bash
git push origin your_username/featuregit push origin your_username/feature- Create a Pull Request (PR) by going to your forked repository on GitHub. Click the "New Pull Request" button.
- Select the appropriate development branch. NOTE: Do not make any changes on the main branch!
- Compare changes, add comments as necessary, then create the PR.
Review and Merge
Collaborators will review your PR, add comments, and suggest changes. Once your changes have been approved, a collaborator will merge your PR into the main repository.
Sync with the Original Repository
- Add the original repository as a remote:
bash
git remote add upstream https://github.com/daedalus/original_repository.gitgit remote add upstream https://github.com/daedalus/original_repository.git- Fetch the changes from the original repository:
bash
git fetch upstreamgit fetch upstream- Merge the changes into your local main branch:
bash
git checkout main
git merge upstream/main
git checkout main
git merge upstream/main- Push the updated main branch to your forked repository:
bash
git push origin maingit push origin main